
In many cases, the agent and controller will be able to immediately connect to one another, and will even automatically detect one another if they are both connected to the same local LAN. This section outlines the configuration options available for the agent, should an error be received while attempting to connect to it.
In order for the controller to connect to an agent, the agent will need to be able to accept connections from the controller on at least one network interface. The IP address and port number used to accept connections may be controlled by using a plain text editor to edit the file "system.properties" (creating it if it does not exist), located in the directory where the agent was installed. The following lines may be added:
RmiAgentAddress=192.168.1.62
RmiRegistryPort=1099
RmiAgentPort=1100
These values have the following effect:
Additionally, it may be necessary to specify the public IP address from
which the agent will be accessed, especially if that IP address is assigned
to a NAT or firewall device other than the server itself. This may be
specified by editing the file "Server Monitor Agent.lax", and
adding the option:-Djava.rmi.server.hostname=site.mycompany.com
to the end of the "lax.nl.java.option.additional" entry in the
file.
For example:
lax.nl.java.option.additional=-Djava.library.path=lib32 -Djava.rmi.server.hostname=site.mycompany.com
If the "lax.nl.java.option.additional" entry does not already exist, it may be added to the end of the .lax file, along with a blank new line after the entry at the end of the file.
Once all of the settings have been entered and saved into the appropriate files, the agent may be restarted in order to pick up the correct settings.
In some cases, only a single public-facing IP address on the firewall is available for use. If there are multiple server agents behind that single firewall address, they must (obviously) use different port numbers on that address. In this case, the server agents MUST be configured to use those same port numbers. Mapping port numbers on the firewall to different port number on the server agents will result in connection failures.
Some network environments may restrict the access of a server, making it unavailable for automated control by Web Performance Load Tester to collect data during a Load Test. In such scenarios, it is still possible to collect performance data from your server by using the Advanced Server Analysis Agent to collect a log file, which may be integrated with a load test. Running the Server Agent in this scenario involves the following steps:
As of version 4.2, it is no longer necessary to import any license onto the agent.
Data collection may be started on the Server Agent by entering the command
start-log --sample-period <period>
replacing <period> with the same sample period set in Load Tester for your test. For example:
start-log --sample-period 10s
To set a sample period of ten seconds. In general, the sample period on the Server Agent should match the sample period selected in Load Tester.
The Server Agent will then begin data collection, and display a message indicating the location of the performance log file.
Before beginning data collection and your load test, it is recommended that the following settings be verified:
To stop collection of performance data, from the Server Agent command prompt, enter the command
stop-log
Next, note the location of the performance log file, and copy this file to the workstation running Load Tester.
Once the performance logs have been stopped and moved from the server to the Load Tester workstation, they may be integrated with a completed load test result. To import server logs, right click on the test results, and select Import → Advanced Server Analysis Agent Log…
Next, select the .dat file(s) to import.
You may update the name of each server, as it will appear in the load test report, and add or remove as many log files as you choose.
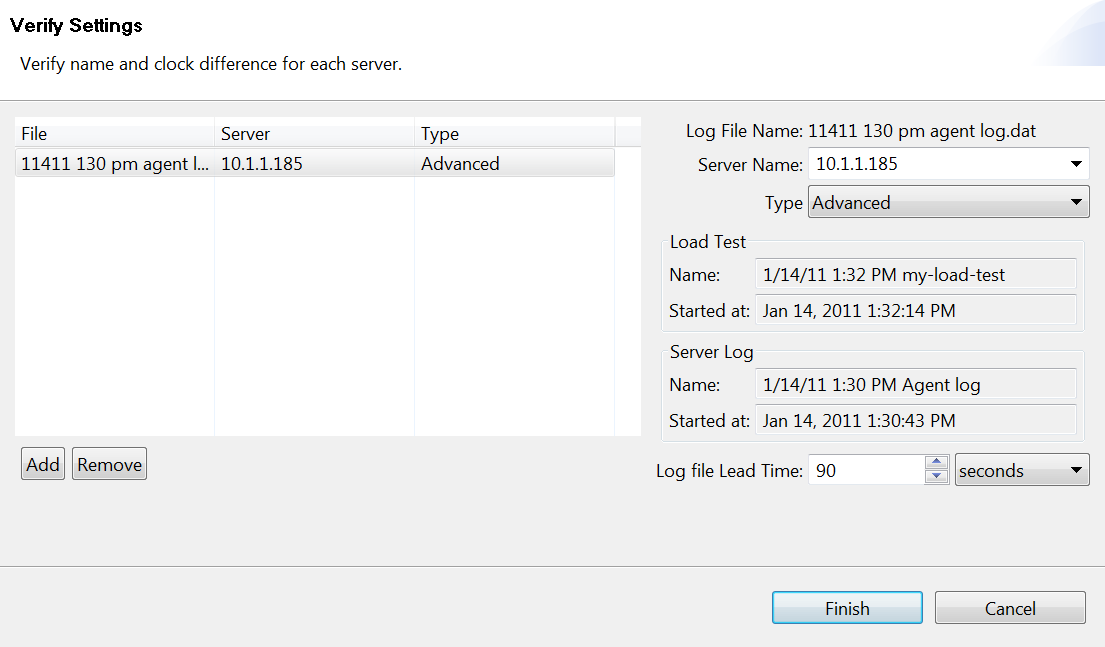
Each log may be imported in "Advanced' or "Basic" mode, depending on whether or not you have purchased a license to use the Advanced Server Monitor Agent.
The "Log file Lead Time" may be adjusted to reflect how far in advance the log file was started prior to the test. It is recommended that this number be divisible by the sample period, for best correlation with measured load test results. Normally, this value will not need to be modified, unless the system clock for the workstation running Load Tester, or the Server Agent was set incorrectly.