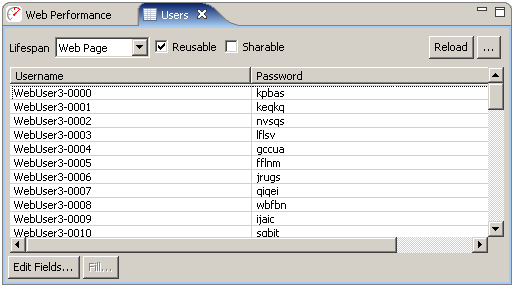
The lifespan of the dataset defines how long the Virtual User will use values from the same row before fetching the next row of values. Note that if a testcase does not use any values from a dataset, no rows will ever be used.
Some examples of the correct settings are described below. Virtual user, testcase and web page are the most commonly used settings. The lifespan settings that are not mentioned are rarely used. If you are not sure why you would need it, then you probably don't.
For a dataset containing usernames and passwords, the lifespan should usually be configured as testcase. If each virtual user should repeat the testcase using the same identity each time, the lifespan should be set to virtual user. Any other lifespan setting will probably be inappropriate for user identity datasets.
For a dataset containing values that a user will enter into fields on a web page form, the lifespan should could be set to either testcase or web page. If the dataset contains values for more than one page, it should be set to testcase.
If enabled, this setting will allow a Virtual User to start over at the beginning of the dataset when all the rows have been used. This could mean that a row is used more than once.
Note that if a dataset is not reusable, the load test will encounter errors and terminate when all the rows have been used.
If enabled, this setting would allow multiple Virtual Users to simultaneously use the same row from a Dataset. If a dataset is not reusable, it cannot be sharable.
Note that if a dataset is not sharable, the dataset must have more rows than the number of Virtual Users in the load test.
To edit an entry in a dataset, double-click the cell and start typing. Press <ESC> to cancel the changes and <RETURN> to move to the next cell.
To add new rows, edit the last cell and press <RETURN>. A new row will be created with sample data - continue filling in new rows by typing new entries and pressing the <RETURN> key. Press the <TAB> key to finish editing the last new entry.
There are two options for reloading a dataset from an external file: automatic and manual.
The Reload button will attempt to automatically re-import a dataset using the settings that were originally used to import the dataset the first time. If an error occurs, or the dataset was not originally imported, then the manual method must be used.
The manual reload button (...) beside the Reload button will open the dataset import dialog. If the dataset was originally imported from a file, those settings will be preset in the dialog. If not, the dialog will have the settings last used to import a dataset.
The Edit Fields... button will open the Edit Dataset Fields dialog, which is similar to the New Dataset dialog shown in the Datasets section.
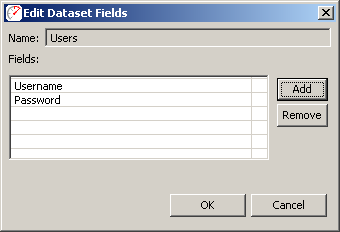
This allows the creation or removal of fields in the dataset. A field may be effectively moved by deleting it and adding a new field at the end with the same name.
The Fill... button allows the selected field to be filled with generated values. Select the field to be filled by pressing the field name (column heading) in the table. Then press the Fill... button to open the Fill Dataset Field dialog:
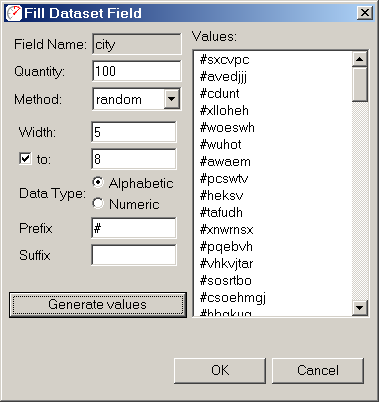
The Method field allows selection from three generation types:
Note that the Quantity field will be automatically set to the total number of rows in the dataset. The Width field defines how long each generated value will be. The Data Type chooses between alpha and numeric data. A preview of the data is available in the list at the right after pressing the Generate Values button. After generating values, pressing the OK button will save the values into the dataset.