Open topic with navigation
Managing software updates
Preparing for an update
1. Run Load Tester as an Administrator
In order for Load Tester to update itself, Load Tester must be running with Administrator privileges.
- Windows XP and Windows 2003: it will be necessary to run Load Tester from an Administrator user account.
- Windows Vista, 7, 2008, and newer: it will be necessary to right-click on the Load Tester shortcut and start it with the "Run as administrator" option.

2. Decide on type of update
Load Tester can download minor version updates, as well as service updates (patches).
- Minor Updates (eg: 4.2 to 4.3):
- Minor Updates provide new features in Load Tester, and are available to users with an active support contract. When performing a minor update:
- The WPT repository file format may change in newer versions of Load Tester. After Load Tester has been upgraded, it will automatically upgrade repository files that it opens. In the event the file needs to be used by a previous version of Load Tester, it is recommended that backups be made of the WPT repository files before performing the upgrade.
- Minor updates may require a current version license (included with Load Tester's Premium Support) for full functionality. If Load Tester is upgraded without a current license, then the new version of Load Tester may operate in a limited free mode until an updated license is installed.
- Service Updates (eg: 4.3.9800 to 4.3.9830):
- Service Updates are provided generally to fix defects, and are free to all customers.
See See "Configuring Updates to upgrade to new minor versions" to select the type of update to download.
Retrieving updates
For updates, the update manager is used to find and
install the new software. To view and install patches available, follow
these steps:
|
1. From the Help menu, select Software Updates...
2. Select the Search for updates...
item and then press Finish
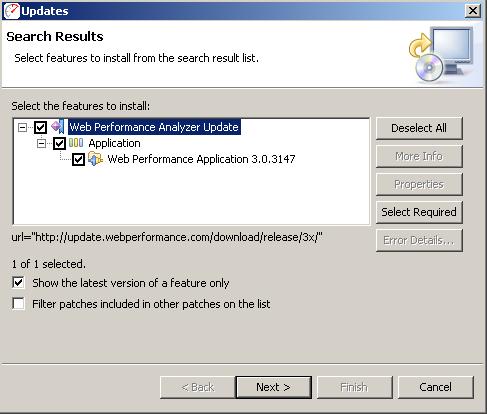
3. If there are service updates available for your software, the results
are displayed (as shown). To install the update, make sure the version
is checked then follow the wizard instructions.
4. Follow the instructions on the next few wizard pages to complete
the installation.
|
|
Configuring Updates to upgrade to new minor versions
By default, the software only downloads patches. This prevents accidental
upgrades to a version of the software for which the installed license
is not valid. Once this happens, a re-install is required to get back
to the previous version.
It is recommended that this option only be turned on when a minor upgrade
is desired and then turned back off.
A new license is required with minor version upgrades. If you have not
requested a new license and wish to upgrade your software, see our licensing information web
page before continuing.
To enable the update manager to also find/install minor upgrades (e.g.
3.0 -> 3.1), follow these steps:
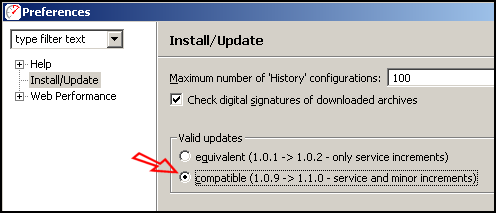
- Open the preference manager from the menu: Window->Preferences
- Select the Install/Update
category
- In the Valid
Updates section, select compatible.
|
|
Once the update manager has been configured, follow the procedure described
under Retrieving patch updates
to view and install minor version updates. After installation of the new
software, install the new license (see License
Management for detailed instructions).
Updating from a new Update Site
If you have been instructed to download a new version of the software
from a new update site, the update manager is used to configure the application
to use the new site in the search for software changes.
|
1. From the Eclipse Help menu, select Software Updates...
|
|
|
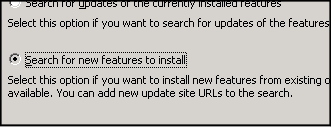
2. Select Search for new features to install and click Next
|
|
|
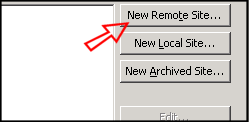
3. Select New Remote Site...
|
|
|
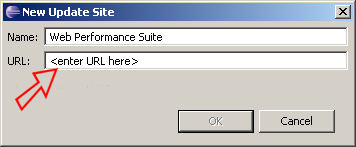
4. Enter "Web Performance Load Tester" for the Name and
the new update site for the URL
Select OK
Select Finish
|
|
|
|
|
Open topic with navigation

